** Affiliate links are used throughout this post at no additional cost to you. This allows me to kee

** Affiliate links are used throughout my blog posts and on the right side of my blog at no additional cost to you. This allows me to keep bringing you content. Thank you all for your support! **
Showing posts with label GUI growing in unity. Show all posts

Friday, September 24, 2021

Growing in Unity {Day 5}

I have had so much fun this week with all of you! As all good things must come to an end, today is day 5 and my final post for GIU. I had so much fun creating the projects that I shared this week and it was so fun to get to know more about you in your responses to my posts. Thank you so much for sharing my week with me!


For today, I am sharing a few cards that I made using another one of my favorite Kit of the Months,"Lucky to Have You" 2/12 KOM. This one goes way back... but I have used these images from the kit many times over the years. I love the vintage look and that clock image is my all time favorite. 


For the first card, I blended Antique Linen distress oxide, Antique Linen distress ink {not oxide}, and Gathered Twigs distress Oxide over Newton's Nook Argyle Stencil. Then I heat embossed the clock image using Walnut Stain Distress Embossing Glaze. I really love how it turned out so you could imagine my utter sadness when I stamped the two vintage cars and realized the one on the right was not even close to straight. (why it is always good to check that on scrap paper first!) 


But, you know what....there are no mistakes in art, only embellishment opportunities! So I decided to get creative with the sentiment to try and hide this little bump in the road. Once, I adhered the sentiment, I decided I wanted to add some ink splotches to the card. I didn't want the sentiment to have splotches, so I covered them with Washi tape. To make the splotches, I smooshed Gathered Twigs distress ink on a stamp block and sprayed it with water. Then with a paint brush, I flicked the ink onto the card.


I attached it to brown cardstock with a white core that I distressed for an old look. and removed the Washi tape from the sentiment.


The next card was a fairly easy slimline. I smooshed Antique Linen distress oxide on watercolor paper and blended Gathered Twigs distress oxide around the edge.


I stamped the vintage car images spaced evenly (and straight) down the middle of the panel. Then attached it to brown cardstock that I distressed. Next, I stamped the sentiment, cut it in three and layered it on a strip of black cardstock. To finish this card, I popped the sentiment on foam tape and added it to the card front.


My last card, is also a slimline. I had to get creative with this one too. I ran out of the brown cardstock I used on the other two cards, so I needed to piece together the left over pieces to fit my slimline. I lined up the three pieces on the card base and distressed them. Then, to cover the two lines where the pieces connected, I added thin strips of black cardstock that I also distressed. Voila! You would never know that was not one long piece of brown cardstock! 


I blended Antique Linen distress oxide over the white panel and stamped the two sentiments down the whole panel. Next, I blended some Gathered Twigs distress oxide over a piece of vellum and stamped one of the vintage cars on it. I folded the edge of the vellum over the top and bottom of the white panel and adhered it on the back so you didn't see the glue. I also put a little glue behind the car image and at the bottom, under the big black enamel dot. To finish this card, I added twine and foam tape before adhering it to the card base. 


And I would be remiss if I neglected to mention that I finish off my cards with this awesome stamp from Nic! This is a fairly new stamp as we recently moved and I needed an updated stamp. Magnuson Custom Stamps made it exactly how I wanted it! 


Masculine cards are always hard for me to make. I feel like I tend to purchase more feminine or children oriented stamps. Do you have a type of card that is hard for you to make? Thank you again for stopping by this week. I really enjoyed sharing with you all!!!

Kimberly


Thursday, September 23, 2021

Growing in Unity {Day 4}

I  cannot believe how fast this week is going. I am having so much fun sharing my Unity Stamp Company creations with all of you. For day 4, I would like to share these two cards featuring the "Spark" stamp set and a sentiment from the "Timing is Perfect"stamp set

Generally when I make ink smooshed backgrounds, I do not photograph them. I sometimes make them to use up ink on my glass mat. Sometimes, I am just playing and save them for a later time. I made these backgrounds specifically for these cards, but unfortunately, I did not take a picture of the process and it is real hard to replicate an ink smooshed background. 

If you have not tried ink smooshing, it is really fun, but it is really important to heat set the ink before switching to another color. Otherwise, you will just get mud. Once my backgrounds were dry, I added more ink with stencils. 

These were both made on watercolor paper. For the teal card, I used Peacock Feathers, Twisted Citron, and Mustard Seed distress ink. I also used the Mini Microbial stencil and Mini Moving Vines stencil from The Crafters Workshop. I blended Pumice Stone distress ink over the Mini Microbial stencil in various places on the background.


For the pink card, I used Picked Raspberry, Mustard Seed and Twisted Citron distress ink. I blended Ground Espresso distress ink over the Mini Specimens stencil and Pumice Stone distress oxide over the Mini Microbial stencil. 

To finish the background panel, I stamped the sentiments on them and die cut them using the Gina Marie Designs Labels 6 Cloud Like Edge Nested Die Set. I had some grey white core cardstock in my stash that I distressed with a sanding block and added the ink panel to. 

I stamped and fussy cut the images from the Spark set. Then, I colored them with Copic Markers. I popped them up on foam tape and adhered them to the cards. I hope you like these cards as much as I enjoyed making them! 

Thank you for stopping by! Do you have a favorite technique to use when making cards? 

Copics:

Teal Butterfly
BG10, BG11, BG13, BG23, YG01, YG21

Pink Butterfly
R20, R30, Y00, YR31

Caterpillar
Y00, YG01, YG21, R20, R30

Branch/leaves
E34, E35, E37, G20, YG01, YG21

Kimberly

Wednesday, September 22, 2021

Growing in Unity {Day 3}

Wow! This week is going so fast! As I mentioned in my Bio, the beach is my love language. So I thought it would be fun to share my favorite Kit of the Month. KOM 5/18 "Open Sky, Deep Ocean" is definitely my favorite kit from Unity stamp Company. I love every single image and every sentiment in this kit. 


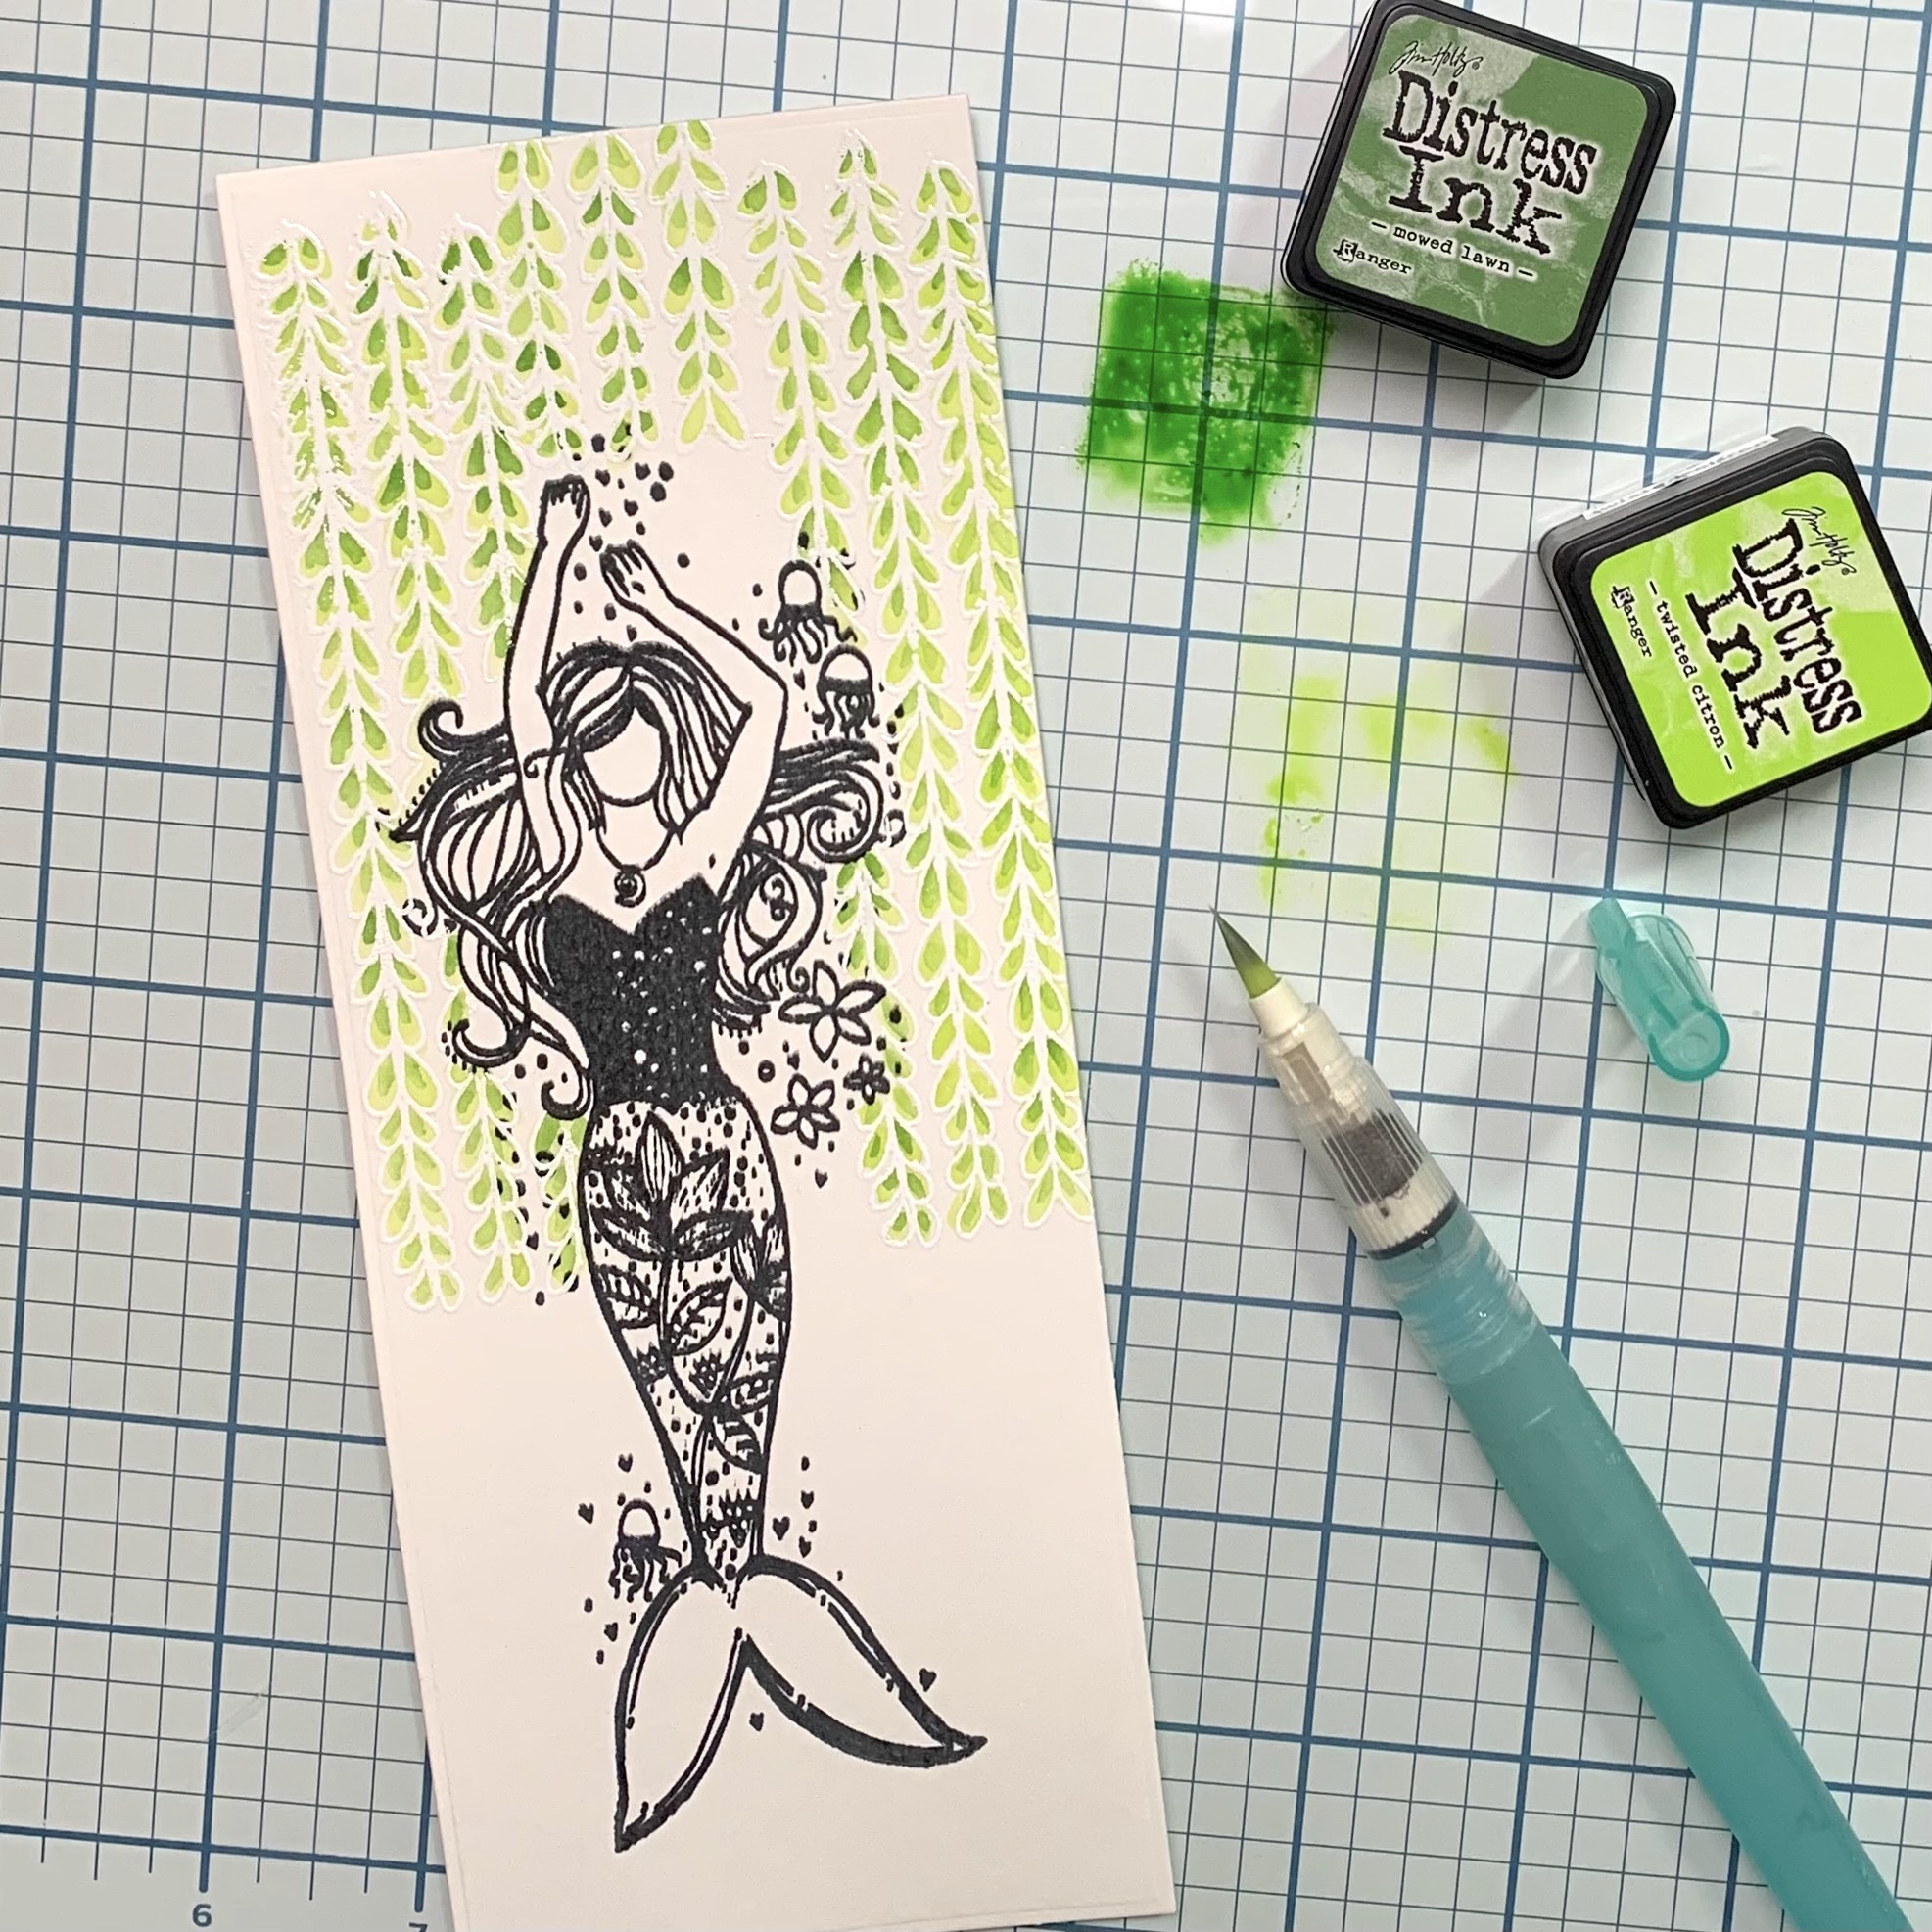
The mermaid image in this kit is perfect for a slimline card. I decided to make it "kind of" a faux shaker slimline card. I love the look of shaker cards, but when you stand them up, all the shaker elements fall to the bottom. Sometimes they get stuck on top of each other and won't move. Sometimes, it is hard to determine the right amount of shaker elements to put in the card. I chose to glue many of the sequins to the panel and left only a few at the bottom so it would still shake, but have the sequins nicely placed when standing up.

I started this card the same way as the cards I made yesterday. I stamped on watercolor paper, X-Press It paper and this time I also stamped a mask.


I put the mask over the watercolor paper image and heat embossed the seaweed image over it using white embossing powder.


I carefully peeled the mask off and used my distress inks to paint in the seaweed and the water.


I do not like wasting the ink on my glass mat (I always seem to put too much) so I will usually start a smooshed background on another watercolor paper. This time I decided to use it to add more dimension to the water on this panel.


Next, I heat embossed the sentiment on heat resistant acetate. 


I cut out a frame using watercolor paper and a combo of two dies that held together with washi tape while die cutting. 


Next, I glued the acetate to the frame using strong double sided tape. I added a double thick foam tape and set it to the side while I colored the mermaid and seahorse. Once I colored the image, I used foam dots to pop up the mermaid, lining it up on the watercolor panel. I used my Wink of Stella glitter brush to add a sparkle to the mermaid. Then, I adhered the sequins to the mermaid panel and left a few loose. Once the glue dried, I attached the frame with the acetate. To finish the card, I added the seahorse image and used my Wink of Stella to add a little more sparkle. 


Copic colors:

Mermaid
Hair: E31, E25  Skin: E0000, E000, E00  Necklace: R85
Tail: BG000, BG10, BG11, BG13, BG34 V01, V04, YG01, YG23

Seahorse: YR68, YR65, Y38, Y13, Y15, Y18
Flowers: YR31, R85, R81 Grass: YG01, YG23

Thank you for stopping by! Do you have a favorite Kit of the Month? 
Kimberly


Monday, September 20, 2021

Growing in Unity {Day 1}

 Hello crafty friends! I am so super excited to be the Growing in Unity girl this week! I have been looking forward to sharing my love for Unity Stamp Company! I have been collecting Unity Stamps for over 12 years. I have to admit, while I sat in front of my Unity collection, I did have a hard time deciding which stamps were going to get used in my projects for this week as I love them all. It is kind of like trying to pick your favorite child {My kids do not believe me, but they are all my favorite}!

I decided that I was going to start out the week with my first stamp set from Unity. When I purchased the Cuter Than Most stamp set 12 years ago, it came in a brown organza bag. Over the years, I built up my stash and truth be told, red rubber is my favorite. It just stamps the best in my humble opinion. So let me share my project for today using the Cuter than Most stamp set.


I made a shaker mini slimline card and three Halloween treat bags with the monsters on the tags . These little monsters are just so stinking adorable and so fun to color. 


This shaker card was super easy to make. I blended Pumice Stone distress ink over a spiderweb stencil on grey cardstock. Then, I die cut a square out of it and added acetate behind the cardstock to cover the square. I stamped the sentiment on the white card base and adhered my first little monster that I stamped, colored and fussy cut. I did want to add, when I colored in this little monster, I drew spots on him using a 0.5 black Copic Multiliner. 

Then, I sprinkled a little bit of black sequins over him for the shaker element. Next, I wrapped black and white twine around the grey panel. I added foam tape and adhered it to my white card base. To finish the card, I added a black frame around the shaker part.


These little bags were so fun to make! I used the MFT Boo Bag die and some patterned paper I had in my stash for them. To make the tags, I used a lawn fawn tag die and grey cardstock. I blended Pumice Stone distress ink over the spider web stencil on the tags. Then, I popped up the little monsters that I had colored and fussy cut on foam tape. I used the other sentiment from the set for one of the tags and die cut the letters for the other two. Then, I tied black and white twine to the tags and attached them to the back using cute little stationary clips.

Copics:

Yellow Monster: Y00, Y11, Y15, V01, V04, BG11, BG13

Purple Monster: V01, V04, V05, R00, R30, BG11, BG13, BG23, YG01, YG23

Blue Monster: BG10, BG11, BG13, BG23, YR31, YR61, YR65, YR68

Green Monster: YG01, YG23, V01

I hope you like my project for today! Do you remember what your first Unity Stamp set was?
 
Thank you for stopping by and don't forget to leave a comment!
Kimberly