** Affiliate links are used throughout this post at no additional cost to you. This allows me to kee

** Affiliate links are used throughout my blog posts and on the right side of my blog at no additional cost to you. This allows me to keep bringing you content. Thank you all for your support! **
Showing posts with label Stencils. Show all posts

Wednesday, December 8, 2021

Love with Layers! {The Hedgehog Hollow}

 Wow, I cannot get enough of the December Hedgehog Hollow subscription box. Everything in it is amazing! I would like to share this card with you that I made using the beautiful stencils in the box!


I started out by blending Black Soot Distress Oxide ink over the word "Love" from the "Love and Home" stencil. These Bitty Bunny blender brushes are perfect for little spaces! Then, I embossed it with clear embossing powder.


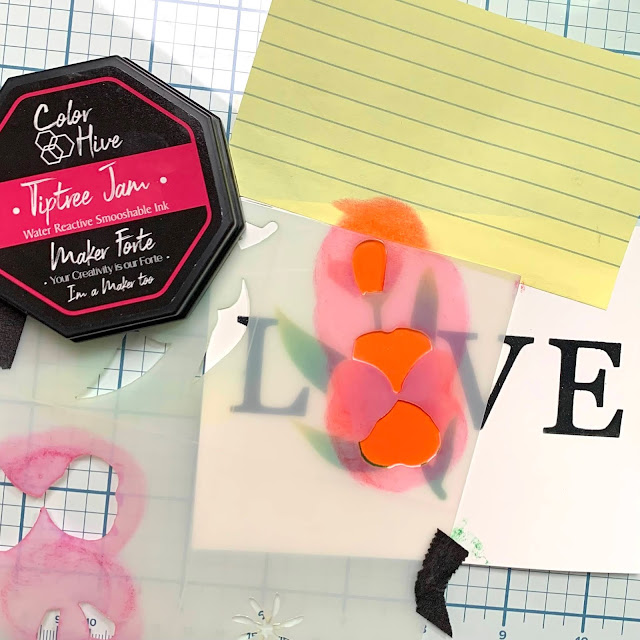
Next, I used the layered "Evening Primrose" stencil to fill in where the 'O' would be in love. To make sure I line up each layer of the flower correctly, I placed the leaves where I wanted them to be and lightly marked where the corner and side were with a pencil. (Don't forget to erase the pencil marks later!)


I blended Hyde Park Color Hive ink over the leaves. Then, I blended a little Everglades Color Hive ink over it to give some dimension. Next, I turned the stencil once and lined it up on the pencil marks. I blended Coral Keys Color Hive ink through the stencil and a little Tiptree Jam Color Hive ink.


Then, I turned the stencil to the other set of petals and did the same thing. I used the post-it note to make sure I didn't get ink on the card panel.


To finish the flower, I turned the stencil to the flower center lining it up with the pencil marks and blended Mustard Seed Distress Oxide ink over the flower center. I trimmed down the panel to 3 1/4" x 5". Then I layered it on a gold panel. To prepare the ultra white card base, I used the "tangled ropes" stencil from the box and blended Pumice Stone Distress Oxide over it.


To finish the card, I added foam tape to the top panel and adhered it to the card base. Then, I added Solar Flair Crown Gem Jewels to the center of the flower and a few scattered. Thank you so much for stopping by! I hope you are enjoying this month's Subscription box as much as I am!!!

Kimberly


Wednesday, October 6, 2021

Your Friendship is My Christmas Gift {Maker Forte}

Hello! Kimberly here with a warm Christmas greeting! I have always loved Christmas cards with Santa in shorts by a palm tree or fish with a tree covered in shells and starfish. This card was right up my alley! How cute is this crawfish and crab decorating a pineapple???? 

I started out using the awesome pineapple layering stencil from the “Farmers Market” June 2021 Hedgehog Hollow Box

I blended the first layer with Yellowstone Color Hive Ink on watercolor paper. Next, I blended the second layer with English Mustard Color Hive ink. Then, I used Limewired and Palm Tree Color Hive ink on the crown of the pineapple. To finish off the pineapple, I gently went over various areas with Gathered Twigs Distress Oxide

To make the background, I covered the stenciled pineapple with the full pineapple stencil and ink blended Gathered Twigs Distress ink on the bottom of the panel.

Then, I blended Salvaged Patina Distress Oxide over the top portion of the panel and spritzed it with water. I dabbed off the water droplets and dried the panel quickly with a heat gun.

Next, I smooshed Gathered Twigs Oxide on an acrylic block and spritzed it with water. I used a small paint brush to splatter the ink over the bottom for the sand. Then, I did the same thing with white ink and splattered it over the top of the panel.

While I put the panel off to the side to let it dry, I stamped the images from the Happy Crawlidays Stamp set on watercolor paper using Eclipse Black ink. I heat set the ink to make sure it was dry. Then, I used Zig pens to color in the images. I fussy cut the images out and added Glossy Accents to the lights on the pineapple to add dimension. Then, I set them to the side so the Glossy Accents could dry. Next, I stamped the sentiment from Modern Christmas Sentiments on the top of the panel and Merry Christmas on a strip of watercolor paper. 

Once everything was dry, I began assembling the card. I glued the pineapple to the the card panel and then put foam tape on the crab and crawfish. Then, I added foam tape to the Merry Christmas sentiment. I added Solar Flare and Tartan Teal Crown Jewel Gems on the pineapple. To finish the card, I adhered the panel to a card base cut from Watercolor paper using foam tape.

{Zig pens} Crab: Carmine Red, Persian Green, Persian Blue Crawfish: Light Carmine Pineapple: Bright Yellow, Light Green 

Thank you for stopping by!

Kimberly

Thursday, September 23, 2021

Growing in Unity {Day 4}

I  cannot believe how fast this week is going. I am having so much fun sharing my Unity Stamp Company creations with all of you. For day 4, I would like to share these two cards featuring the "Spark" stamp set and a sentiment from the "Timing is Perfect"stamp set

Generally when I make ink smooshed backgrounds, I do not photograph them. I sometimes make them to use up ink on my glass mat. Sometimes, I am just playing and save them for a later time. I made these backgrounds specifically for these cards, but unfortunately, I did not take a picture of the process and it is real hard to replicate an ink smooshed background. 

If you have not tried ink smooshing, it is really fun, but it is really important to heat set the ink before switching to another color. Otherwise, you will just get mud. Once my backgrounds were dry, I added more ink with stencils. 

These were both made on watercolor paper. For the teal card, I used Peacock Feathers, Twisted Citron, and Mustard Seed distress ink. I also used the Mini Microbial stencil and Mini Moving Vines stencil from The Crafters Workshop. I blended Pumice Stone distress ink over the Mini Microbial stencil in various places on the background.


For the pink card, I used Picked Raspberry, Mustard Seed and Twisted Citron distress ink. I blended Ground Espresso distress ink over the Mini Specimens stencil and Pumice Stone distress oxide over the Mini Microbial stencil. 

To finish the background panel, I stamped the sentiments on them and die cut them using the Gina Marie Designs Labels 6 Cloud Like Edge Nested Die Set. I had some grey white core cardstock in my stash that I distressed with a sanding block and added the ink panel to. 

I stamped and fussy cut the images from the Spark set. Then, I colored them with Copic Markers. I popped them up on foam tape and adhered them to the cards. I hope you like these cards as much as I enjoyed making them! 

Thank you for stopping by! Do you have a favorite technique to use when making cards? 

Copics:

Teal Butterfly
BG10, BG11, BG13, BG23, YG01, YG21

Pink Butterfly
R20, R30, Y00, YR31

Caterpillar
Y00, YG01, YG21, R20, R30

Branch/leaves
E34, E35, E37, G20, YG01, YG21

Kimberly

Tuesday, September 21, 2021

Growing in Unity {Day 2}

Welcome to day 2 of Growing in Unity! I know most if not all of us have been impacted by someone in our family, friend group or even ourselves by cancer. For me, I have a Grandmother, Mother, Aunt, Mother-In-Law and a few friends who have all had or have breast cancer. Today's post is dedicated to them and to remind all of you (public service announcement) to make sure you get to your annual appointment. Next month is dedicated to remind people to get their checkup, but I thought I would get a head start....Get those TA~TAs checked!!!!


Not only do I love that Unity Stamp Company has so many amazing images, I have fallen in love with their sentiments. They are perfect for so many circumstances. My first two cards we made with many of the same steps so I am going to talk about them together.


I really love the little dots and doodles that usually accompany Angie Girls and some of the Fashionistas. My problem in the past was, when I would fussy cut the image out, do I keep the dots or do I cut them out. So what I did to solve the problem was, I would stamp the image on the panel I was going to adhere the fussy cut image to and then just omit the doodles and dots when I fussy cut it. That way I can keep them but cut close to the image. Here I used Karen Girl and Hope {Fashionista}. The Sentiments are from Here Today, Here Tomorrow and If It Weren't For Cancer.


I knew I wanted the cards all to match so I really didn't need to use watercolor paper for these two, but I used it for the third so I kept it consistent. I started out by stamping the image and sentiment on the main panel using watercolor cardstock and the image I was going to color on X-Press It cardstock. I have been told that if you use Copics on watercolor paper, it will just absorb the color into the paper and use up your ink quicker. That is why I generally use Neenah and X-Press It cardstock when coloring with Copics. 

Next, I blended Catherine Pooler "It's a Girl" ink on part of the panel for the Karen Girl card. Then, I put the stencil down and used the same ink to blend over it. You can see when I took the stencil off, that the stencil got on the image, but it doesn't matter because it will get covered up. (I like that it eliminates the step of masking the image)

I colored both images that I stamped on X-Press It cardstock with my Copics and fussy cut them out. I used foam tape on Karen Girl to pop her up on the card panel. I glued the Fashionista directly to the main panel. Both of these cards are mini slimline cards so, I cut the watercolor down to 6" x 3 1/4". The Karen Girl panel was then attached to a 6 1/2" x 3 1/2" piece of pink cardstock. Next, I planned how to add my sentiment to the Fashionista card. 

There are a couple of things I want to mention about vellum.  My first suggestion is, sometimes we have sentiments that are big and they will cover all the coloring we just did. I like to stamp the sentiment on vellum so you can still see the image under the sentiment. Which brings me to my second suggestion. I know we are always trying to find creative ways to attach vellum to cards without the adhesive showing. My tip here with the Fashionista card is, fold one side over (in this case the left side) behind the cardstock and glue it in the back. Then, on the front, I use clear glue and put a very tiny dot behind a couple of the letters from the sentiment before pressing it down. When it dries, you cannot see it. 

After I attached the sentiment, I added foam tape and attached the panel to a 6 1/2" x 3 1/2" piece of pink cardstock. To finish both cards, I attached them to a white 6 1/2" x 7" card base scored in half at 3 1/2" and added some bling.


For this card, I used the All Things Are Possible set. I started out by ink smooshing the "It's a Girl" ink on a panel of watercolor paper. After I dried it completely, I blended the the same ink over the stencil and cleaned the ink off the stencil. Then I lined it back up on the panel and spread Glossy texture paste over the stencil in some areas. I put that off to the side to dry and cleaned the paste from the stencil so it wouldn't dry on it. 

Next, I stamped the butterfly on X-Press It cardstock and colored it with copics. Because I only colored the outside of the butterfly with Copics, I wanted to add something to the inside. I stamped a mask of the butterfly and cut out the inside part of the butterfly.


Next, I lined up the mask over my colored butterfly, put the stencil over it and blended ink through the open part of the butterfly. 


That gave me cute little dots inside my wings. 


To finish up this card, I die cut the watercolor panel as well as the center of the panel. I added foam tape to pop it up on grey card base. Then, I popped the butterfly up on foam tape and stamped the sentiment on a strip of watercolor paper. I attached them to the card and added some bling. 

Copics used:

Karen Girl
Hair: E31, E25, E29
Skin: E000, E00
Top: R81, R83, R95
Pants: W00, W1
Shoes: T0, T2, T6

Hope {Fashionista}
Wrap and top: R81, R83, R85
Sweater and boots: W0, W1, W2, W4
Pants: T0, T2 
Skin: E000, E00

Butterfly: R81, R83, R85

Thank you so much for stopping by! I hope I might have given you a couple of tips that you can use!
Kimberly


Friday, September 17, 2021

You are the Unicorn of Friends {Brutus Monroe}

 Hello crafty friends! I am back to share a couple more cards using the Brutus Monroe Unique Unicorn Inspiration Box! I love the pre printed toner sheets in the kit. You can leave them black and white and go simple, you can foil them, or you can get as fancy as you want! Today, I went all out on two of them and love the results! 


 For my first card, I ink blended Tumbled Glass distress oxide over the cloud stencil from the clouds and grass stencil set that I had purchased separately. Then, I foiled it with Gina K marigold foil. I used my Sizzix Rainbow Magic die and paper scraps I had in my stash to make the clouds and rainbow. Next, I stamped and die cut the Unicorn from the Unique Unicorn stamp set in the kit. Then, I colored it with Copic markers. I trimmed a sentiment from the conversation clippings in the kit. Next, I assembled the card. I adhered the toner panel to a piece of the beautiful glitter paper in the kit. Then, I glued the rainbow and unicorn to the panel. To finish, I added foam tape to one of the clouds and the sentiment and attached them to the card. 


My second card features some ink smooshing. I started out smooshing, Picked Raspberry distress ink and heat set it so the colors wouldn't turn to mud. I repeated the process with: Peacock Feathers, Mustard Seed, Twisted Citron, Carved Pumpkin and Wilted Violet distress ink. It is very important to heat set between each color. 


After I finished smooshing the ink and everything was completely dry, I foiled the panel with Gina K Marigold foil. Next, I stamped and die cut three stars and the pegasus using the Unique Unicorn stamp and matching die set in the kit. Then, I colored them in with Copic markers. I cut the sentiment from the conversation clippings in the kit and started to assemble the card. 

I adhered the toner panel to a piece of the glitter cardstock from the kit. Then, I added two stars and the sentiment. To finish the card, I added foam tape to the back of the pegasus and one star to pop them up for dimension. 


I love how fun and colorful this is! Thank you so much for stoping by and get the Unique Unicorn Inspiration box before they are all gone!!!

Copics used: 

Stars: Y00, Y11, YR31

Unicorn and Pegasus: R20, Y11, G20, B0000, V01, W00, E40 and T3

Unicorn/Pegasus Horn: Y11., Y15, YR23 Cheeks: R30

Kimberly

Friday, September 10, 2021

Falling For You {Maker Forte}

 Happy Friday crafty friends! Today I have this quick and easy card using the Jess Francisco/Maker Forte collaboration  “Falling For You” stamp set and Blustery Day stencil.

** Affiliate links are used throughout this post at no additional cost to you. This allows me to keep bringing you content. Thank you all for your support! ** 

To begin this card, I ink blended Telephone Box Color Hive ink through the Blustery Day stencil on watercolor paper. Next, I flipped it over and blended English Mustard Color Hive ink through the stencil. 

Then, I spritzed the stencil with some water and, using a paintbrush, flicked the ink on the stenciled panel for a splattered look. 

I cut the panel down to 4″ x 5 1/4″ and put it to the side. Next, I stamped the images from the Falling For You stamp set on white cardstock using Eclipse Black Color Hive ink. I heat set the ink to make sure it was dry. Then, to add color to the images, I blended them with the ink that was left on my brushes so it would be very light. The colors used were Grand Canyon and English Mustard.

To finish the images, I blended the same colors over one of the Camouflage stencils and over the 3D Background Stencil.

Then, I fussy cut the leaves and pumpkin. I stamped the sentiment on a strip of white and lightly blended English Mustard Color Hive ink on it. Then, I layered it on a strip of Eclipse Black cardstock. I cut an oval from gold cardstock I had in my stash. Before I assembled the card, I added Copic YG05 to the stem of the pumpkin. I adhered all of the pieces to the stenciled panel and added foam to the pumpkin for dimension. Then, I adhered it to the card base I cut from Telephone Box cardstock. To finish the card, I added some Solar Flair Crown Jewel Gems

I just love the ease of adding color to the images by ink blending rather than coloring it in. The stencil almost gives it the look of stamping on background paper and fussy cutting it out.

Thank you for stopping by!

Kimberly

Channeling My Inner Lisa Frank! {Brutus Monroe}

Happy Friday! I am so excited to share this card I made using the new Brutus Monroe Subscription Box "Unique Unicorn"!  Everything about this card brings me back to my school days when Lisa Frank stickers were the "in" thing! 

** Affiliate links are used throughout this post at no additional cost to you. This allows me to keep bringing you content. Thank you all for your support! ** 


I began by ink blending the following Distress Oxide inks: Picked Raspberry, Carved Pumpkin, Mustard Seed, Twisted Citron, Mermaid Lagoon, and Seedless Preserves


Next, I blended the same inks over themselves through the Brutus Monroe Mixed Media: rainbow stencil that I had in my stash.


Then, I watered down a little gold acrylic paint and flicked it on the ink blended panel.


Next, I stamped out and die cut a bunch of images from the beautiful stamp set and matching dies from the inspiration box. I chose to use a unicorn, butterfly and the rainbow images. I colored them using Copic markers. 


The Copic Markers that I used are:
Unicorn: T0, T3, T7, R20, R30, W00, E40, Y00, Y11, Y15, YR23
Unicorn Mane, Tail, and Rainbow: RV21, RV25, YR65, YR68, Y32, Y35, YG03, YG05, BG01, BG45, V01, V05

Then, I began assembling my card. I adhered the rainbow panel with foam tape to a card base using teal cardstock for the Inspiration Box. I added a frame from my stash, followed by the rainbow and butterfly. I added foam tape to the unicorn and adhered it to the card. I added a conversation clipping from the inspiration box and finished it off with some sequins. 

I love how colorful this card is. Do you ever make cards that remind you of your childhood? 


Thank you for stopping by!
Kimberly


Tuesday, August 31, 2021

Day 2 of The Rabbit Hole Designs New Release Blog Hop!

Hello Gorgeous!  How exciting is The Rabbit Hole Designs blog hop??? I love all of the projects that my fellow team members have been sharing with all of these awesome new products! Isn't this card so cheerful?

** Affiliate links are used throughout this post at no additional cost to you. This allows me to keep bringing you content. Thank you all for your support! ** 

To make my card I ink blended distress oxides through the Mid Century Modern Stencil on white cardstock using these awesome new Bitty Bunny Blending Brushes. Ink used: Picked Raspberry, Carved Pumpkin, Mustard Seed, Twisted Citron, Mermaid Lagoon, and Wilted Violet.


Next, I smooshed some ink on an acrylic block, spritzed it with water and flicked it onto the cardstock to make the splatters. I die cut the Hello shadow die out of white cardstock and the word Hello die cut out of black eclipse cardstock. I adhered them together, added foam tape to Hello and attached it to the stenciled panel. I layered the stenciled panel to a piece of Eclipse Black cardstock and then to a white card base

To finish the card, I stamped the word "Gorgeous" from the matching Hello stamp set on a strip of white cardstock. I layered it on an Eclipse Black cardstock strip and added foam tape to add dimension. This was a real fun card to make and pretty easy to put together! 

Thank you for stopping by!

Hop along with my amazing Team Members:

The Rabbit Hole Designs
Amanda
Jenn
Joy
Kelly
Kim
Lauren
Tangii
Terra
Vanessa

GIVEAWAYS:

To celebrate the next three days of release,  The Rabbit Hole Designs is giving away two savings vouchers; one to a lucky Instagram Follower and one to a lucky Fan Page follower.  Winner will be chosen at random from the comments left on the INSTAGRAM post, and tagging friends, and also from commenting on the Fan Page post.  So make sure to head on over to INSTAGRAM and look for the giveaway post  @therabbitholedesignsllc and look for the post  at The Rabbit Hole Designs Fan Page by 11:59 p.m. PST 09-02-2021.  Winner will be announced on The Rabbit Hole Designs blog 09-03-2021.


Tuesday, August 24, 2021

Craft, Cocktails and Cards with some sparkle! {Using a 6x6 stencil on a slimline card}

 Hello crafty friends! Today, I have a sparkly slimline card to share with you! I used the Jess Francisco and Maker Forte collaboration “Take a Sip” Stamp Set along with the new Vintage Vines square stencil. 

** Affiliate links are used throughout this post at no additional cost to you. This allows me to keep bringing you content. Thank you all for your support! ** 
To make this card, I started out by blending Pop Art color hive ink through the Vintage Vines stencil. Since it is a square stencil, I needed to block the bottom of the card from getting ink overflow when I was blending. To do this, I placed a post it note at the bottom.

Then, I flipped the stencil upside down and matched it up with the bottom stenciled part. I used the post it note to protect the part that was already ink blended. 

Once I had the whole panel covered with the stencil, I repeated the process with Gina K glitter gel. Once I finished the top half of the panel with Glitter Gel, I put the card panel to the side to completely dry. Otherwise, the gel will stick to the post it note and it will rip off the card when I add the bottom half of the glitter gel. When the gel was dry, I finished the bottom half of the panel with the gel. Then, put it to the side to dry.

Next, I stamped two images from the Take a Sip stamp set using Eclipse Black ink. I colored them in and fussy cut them. Then, I foiled one of the sentiments from the Sip Happens sentiments with Gina K Mango Fancy Foil. I cut a piece of Welsh Dragon cardstock to 3 5/8″ x 8 3/8″ to mat under the stenciled panel. I added foam tape to adhere it to an Ultra White card base cut to 8 1/2″ x 7 1/2″ and scored at 3 3/4″. 

To finish the card, I popped the images and sentiment up on foam tape. Then, I adhered them to the card. Lastly, I added Before the Storm and Solar Flair Crown Jewel Gems using the Rainbow Gem Picker

Thank you so much for stopping by! 
Kimberly