** Affiliate links are used throughout this post at no additional cost to you. This allows me to kee

** Affiliate links are used throughout my blog posts and on the right side of my blog at no additional cost to you. This allows me to keep bringing you content. Thank you all for your support! **
Showing posts with label Tim Holtz distress ink. Show all posts

Wednesday, December 8, 2021

Love with Layers! {The Hedgehog Hollow}

 Wow, I cannot get enough of the December Hedgehog Hollow subscription box. Everything in it is amazing! I would like to share this card with you that I made using the beautiful stencils in the box!


I started out by blending Black Soot Distress Oxide ink over the word "Love" from the "Love and Home" stencil. These Bitty Bunny blender brushes are perfect for little spaces! Then, I embossed it with clear embossing powder.


Next, I used the layered "Evening Primrose" stencil to fill in where the 'O' would be in love. To make sure I line up each layer of the flower correctly, I placed the leaves where I wanted them to be and lightly marked where the corner and side were with a pencil. (Don't forget to erase the pencil marks later!)


I blended Hyde Park Color Hive ink over the leaves. Then, I blended a little Everglades Color Hive ink over it to give some dimension. Next, I turned the stencil once and lined it up on the pencil marks. I blended Coral Keys Color Hive ink through the stencil and a little Tiptree Jam Color Hive ink.


Then, I turned the stencil to the other set of petals and did the same thing. I used the post-it note to make sure I didn't get ink on the card panel.
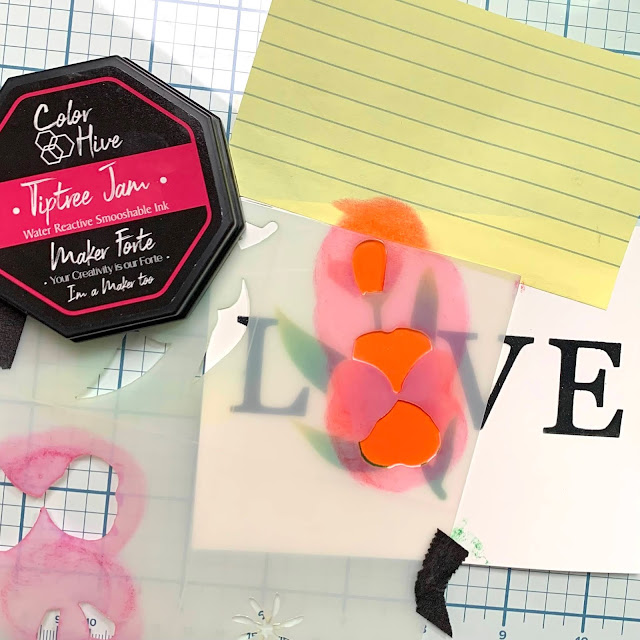

To finish the flower, I turned the stencil to the flower center lining it up with the pencil marks and blended Mustard Seed Distress Oxide ink over the flower center. I trimmed down the panel to 3 1/4" x 5". Then I layered it on a gold panel. To prepare the ultra white card base, I used the "tangled ropes" stencil from the box and blended Pumice Stone Distress Oxide over it.


To finish the card, I added foam tape to the top panel and adhered it to the card base. Then, I added Solar Flair Crown Gem Jewels to the center of the flower and a few scattered. Thank you so much for stopping by! I hope you are enjoying this month's Subscription box as much as I am!!!

Kimberly


Tuesday, February 16, 2021

TRHD Corner Mandala with Caffeinated Rhino!

 Hello crafty friends! Today's post features a couple of my favorites from The Rabbit Hole Designs! My card pairs the recently released Corner Mandala and an older favorite of mine, Caffeinated Rhino. I just love how well they go together! 


I started making the background by lightly blending Speckled Egg and Pumice Stone Distress Oxides on watercolor paper. Then I put the stencil on the blended cardstock and blended Distress Glaze over some areas of the stencil (this is a resist glaze so ink will not stick to it). 


After I blended the distress glaze, I sprayed over the stencil with Pumice Stone Distress Spray. I dabbed off the excess ink before taking off the stencil to prevent too much leaking under the stencil. Then I stamped my Caffeinated Rhino on a smaller piece of watercolor paper with Ranger Archival ink. I used my distress inks to watercolor in my Rhino and the bird. Then I die cut them using the Caffeinated Rhino die. I also die cut a "shadow" for the rhino with grey cardstock just to add a little bit of color behind him. I used the sentiment from the stamp set by embossing it with white embossing powder on black cardstock. Once I had all of my pieces as you see here:


... I began to build my card. I cut down the Background to 5 1/4" x 4" and added that to a piece of grey cardstock. Then I glued my rhino slightly staggered off the grey rhino "shadow" and added foam tape behind him to pop him up. I glued the little bird to the tip of his horn and added a tiny piece of foam tape behind it as well. I attached the sentiment to the bottom of the card and used that as a ground for the Rhino to "stand" on so he didn't look like he was floating in air. Finally, I attached this to a white card base. I just love the soft colors!


Thank you for stopping by! 


Kimberly